Do you end up with lots of small scraps of paper when you’re scrapbooking? Do you throw them away, or save them for another project? Is that pile of saved scraps just growing, because you don’t know what to do with them?
Here is an idea I have adapted from a post on the Creative Memories blog. It uses up small pieces of paper. While it can be done using strips from new sheets of paper, it is a fantastic way to use up some of those scraps.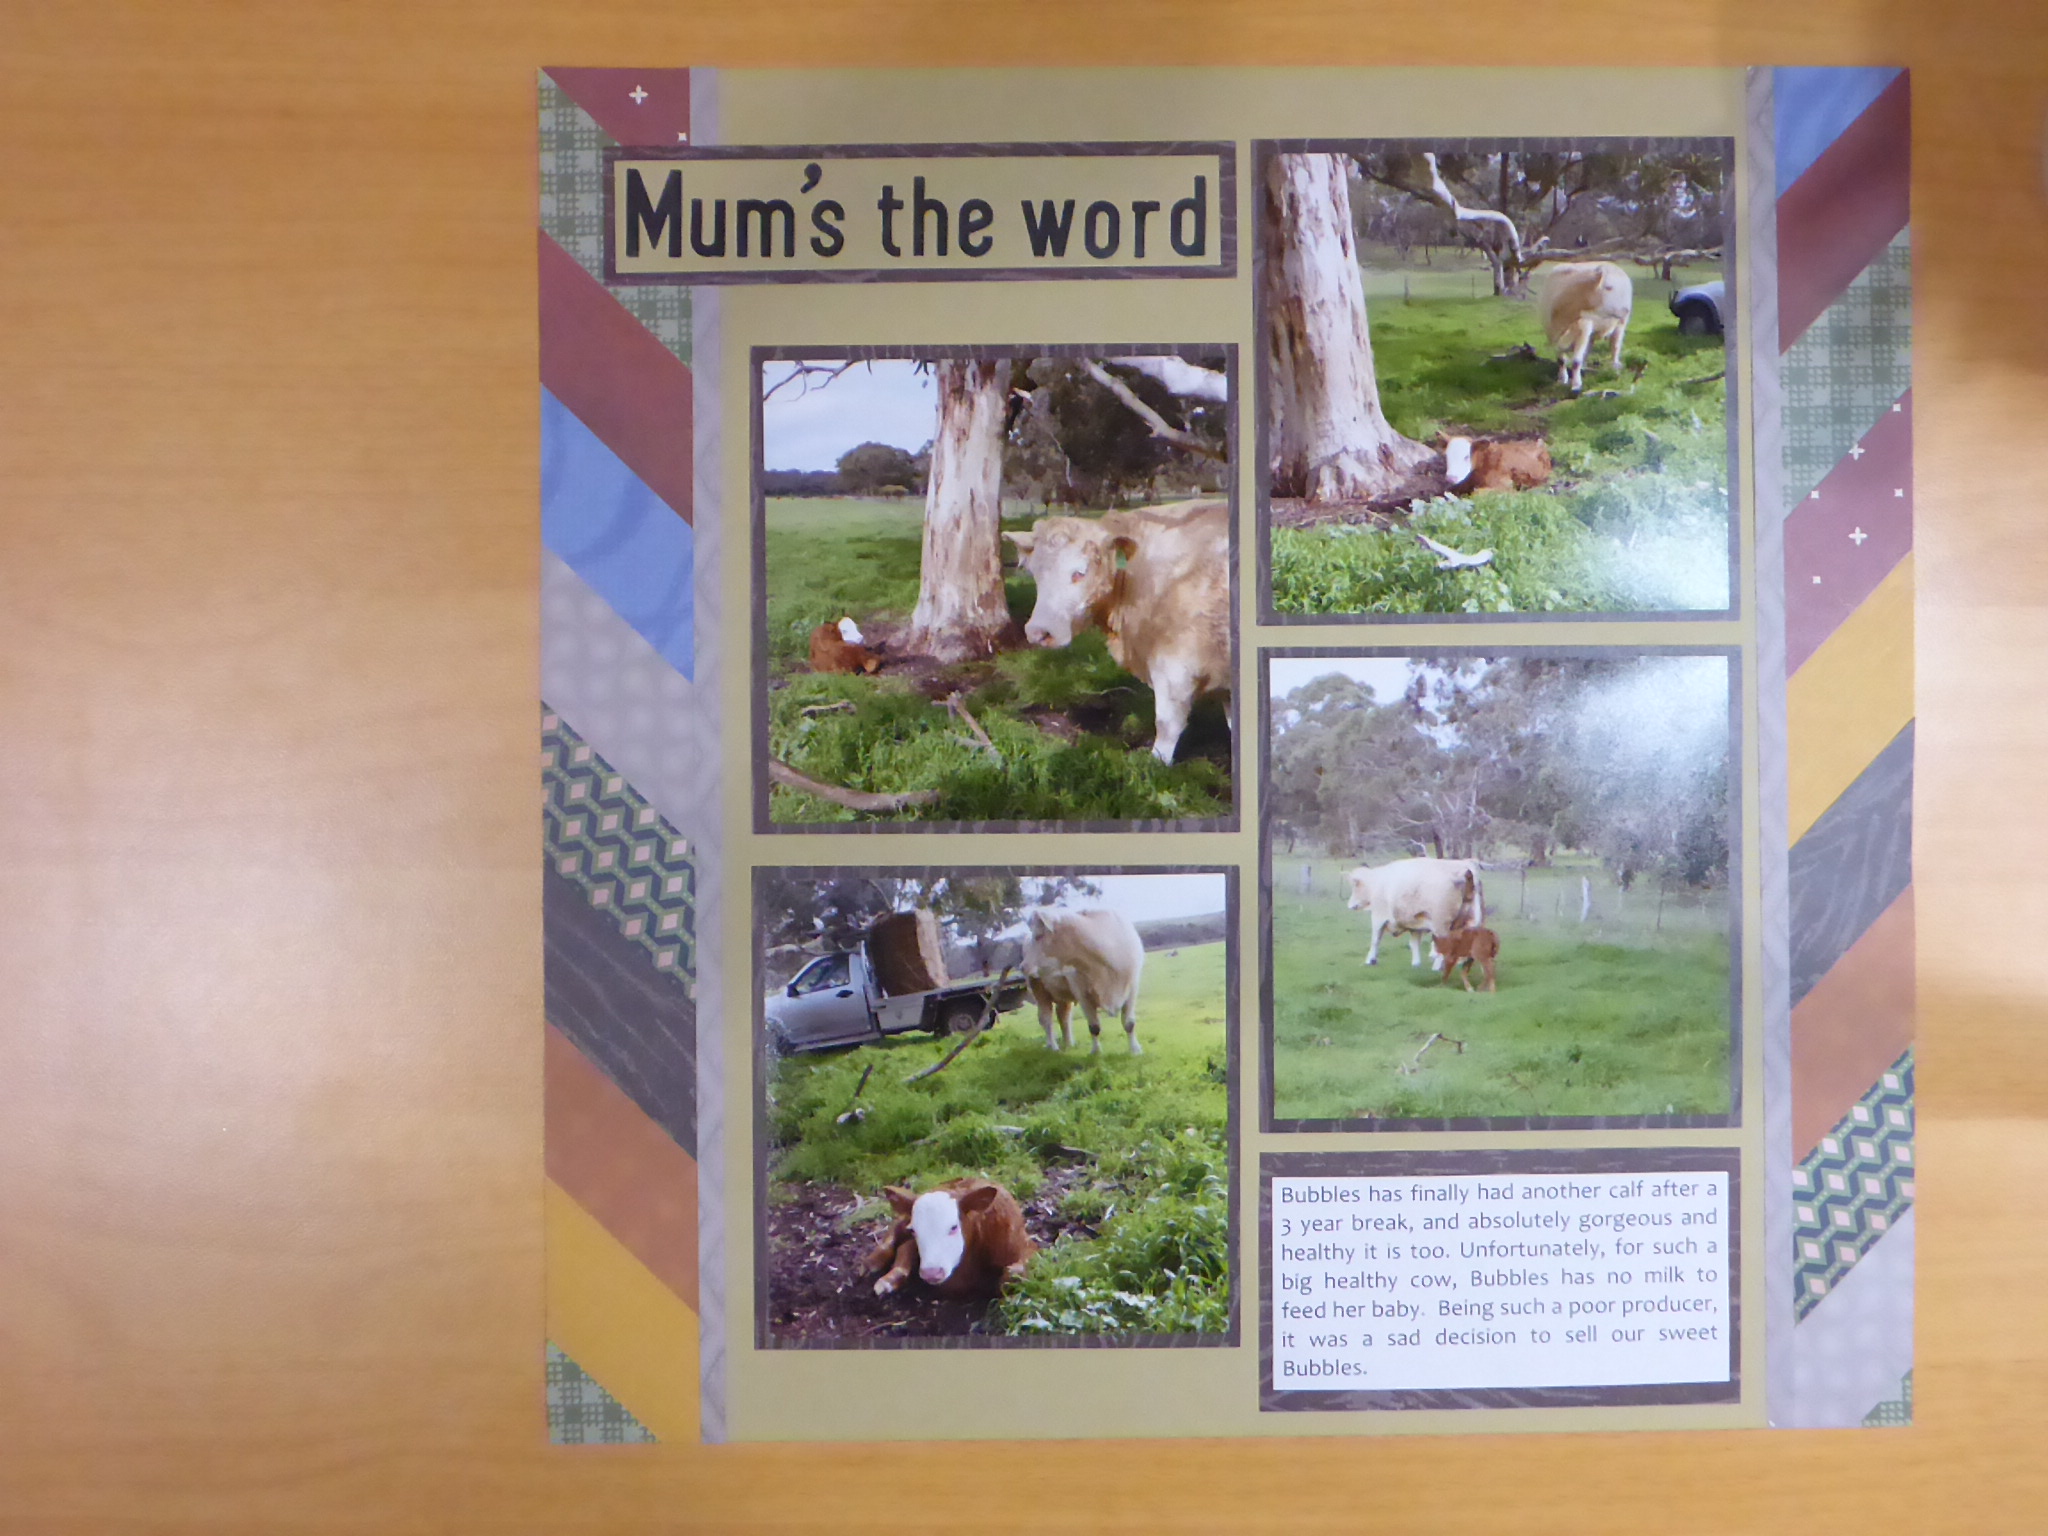
When I first saw the original idea on the Creative Memories Blog I thought what a great way to use up some scraps. But not only that, it is a quick and simple page that can be adapted to so many themes, purely by using those different scraps.
To create this layout, you will need:
- 1 sheet of Cardstock for the base
- Several pieces of scrap paper to complement your photos
- 12-inch Trimmer
- Tape Runner
- Repositionable Tape Runner
- Micro-tip scissors
- Black Dual Tip Pen
- Alphabet Stamp Kit System
Instructions:
- I used a piece of Beige cardstock for the base of this layout.
- Cut 20 strips from a variety of patterned papers to measure 3” x 1”.
- Divide these strips into two piles, one pile to use on the left side of the page, and one pile to use on the right side of the page. Even your strips out so that you do not have a lot of the same colour or pattern in one pile.
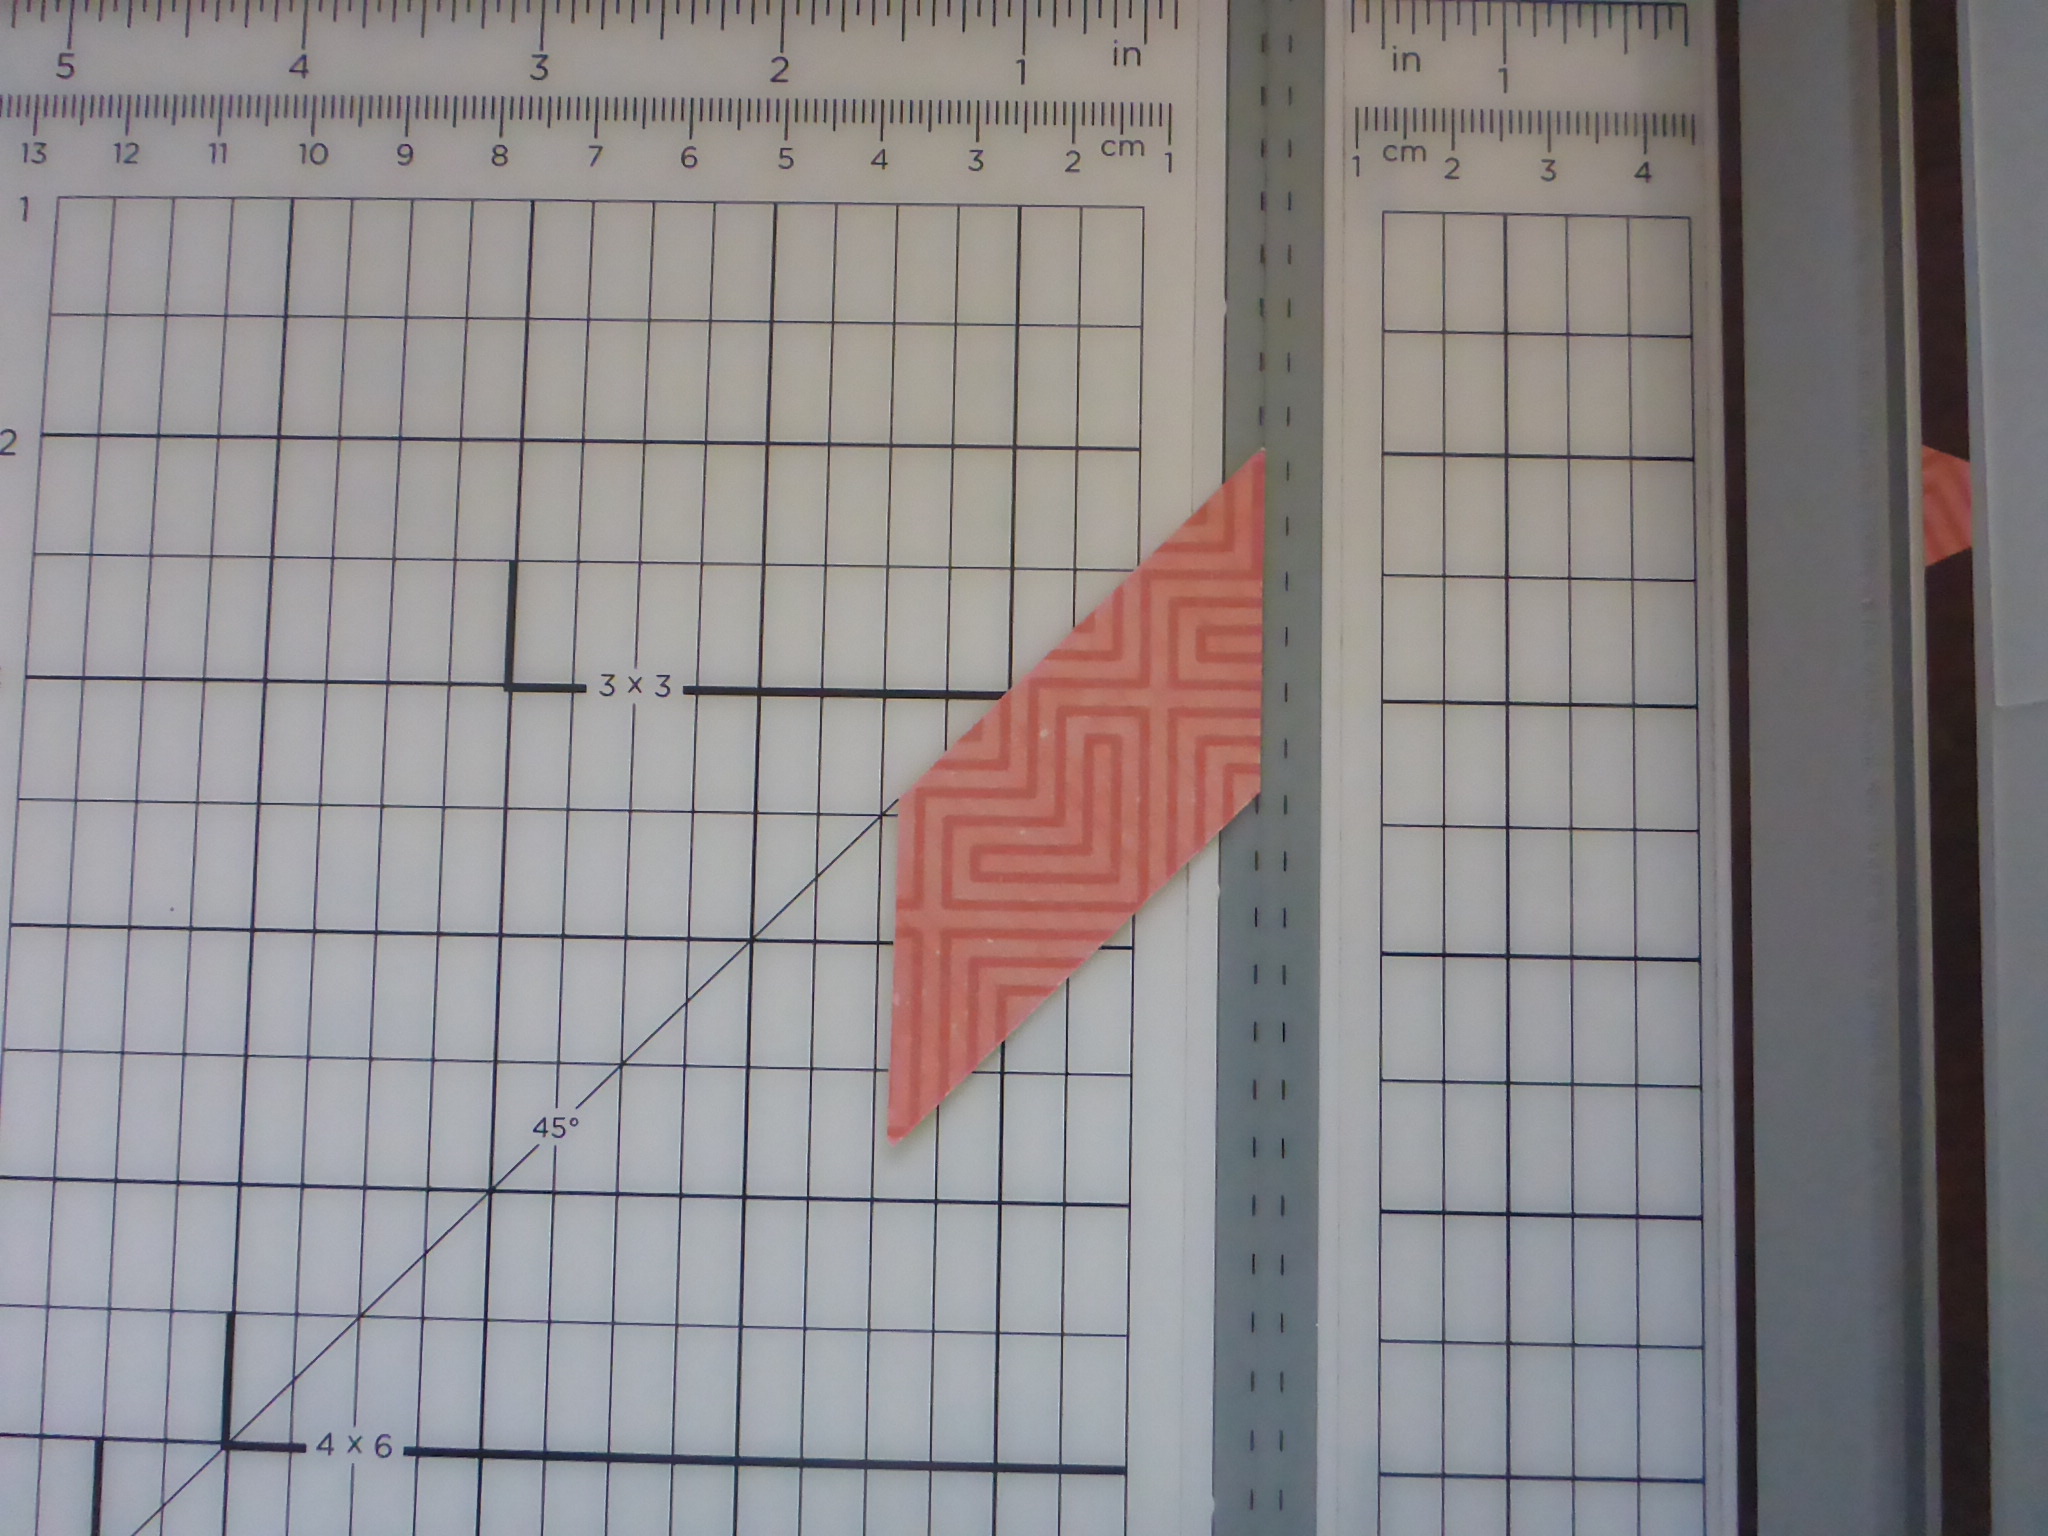
- Using the first pile of strips (pile 1), cut the end of one strip at a 45-degree angle on your 12-inch trimmer, lining up the long edge of your paper with the 45-degree angle line and the top left point with the cutting line.
 Leave your strip laying flat on your trimmer and turn it 180 degrees. Do not flip it! Now trim the other end of this strip at a 45-degree angle on your trimmer. Your piece should look like this.
 - Repeat step 4 with the remaining strips in your first pile, trimming both ends at a 45-degree angle. Put all these strips to one side, still in their pile.
- Now using the second pile of strips (pile 2), turn all of the strips over, so that the piece that you want showing on your layout is face down. Again repeat step 4 until you have trimmed all 10 strips in this pile. Collect all together and keep in a neat pile.
- Using pile 1, using your repositionable tape, adhere these strips to the right side of your cardstock, with one short trimmed edge lining up with the edge of the cardstock. Start with the first piece at the top right corner of your cardstock, and work down the page. You will come back to the top piece after you have all the others stuck on.
- Now using pile 2, repeat this process on the left side of your page, until all pieces are adhered on. Trim off any overhanging pieces with your Micro-tip scissors. I found it easier to lay my cardstock on its side, and work on the edge closest to me, and when done, orient the page as I wanted to.
- Cut two strips of complementing cardstock or paper to measure ¼” x 12”. Adhere along the inside edges of the diagonal pieces.
- Trim photos to required size to fit on your page. Mat photos if desired and adhere to page with tape runner.
- Create title frame by using the Alphabet Stamp Kit System to create your desired title onto another piece of cardstock. Cut to desired size. Mat as desired, and adhere to page with tape runner.
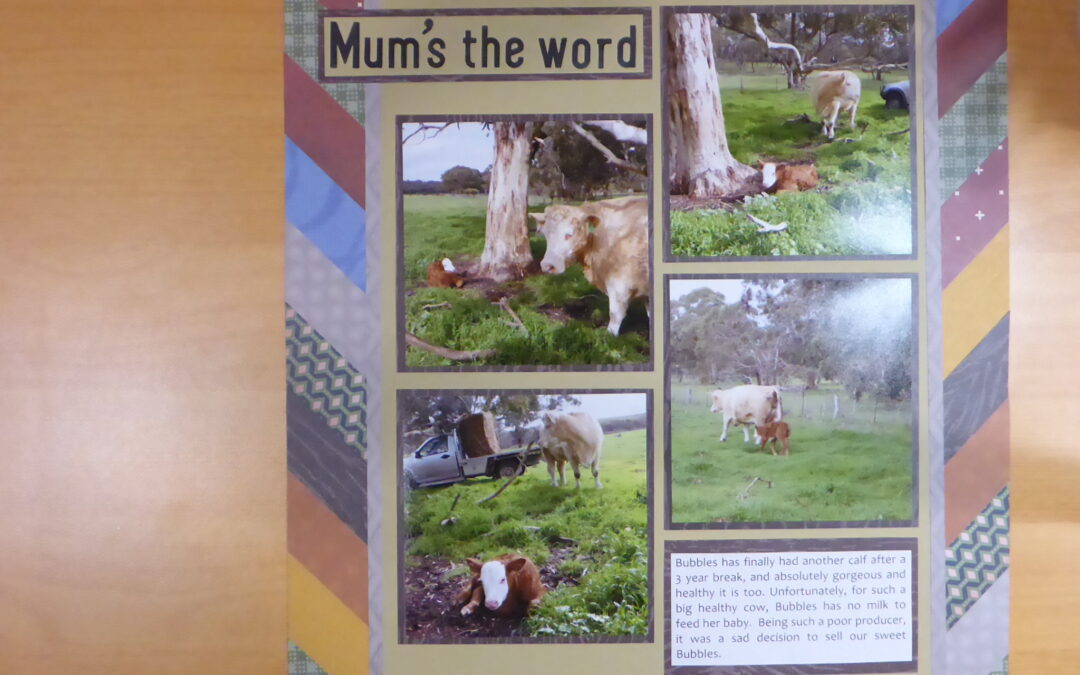
- Embellish as you wish, and don’t forget to add your journaling, using your black dual tip pen, or as I have done in layout example 1, type your journaling to the correct size journaling box and adhere to your page.
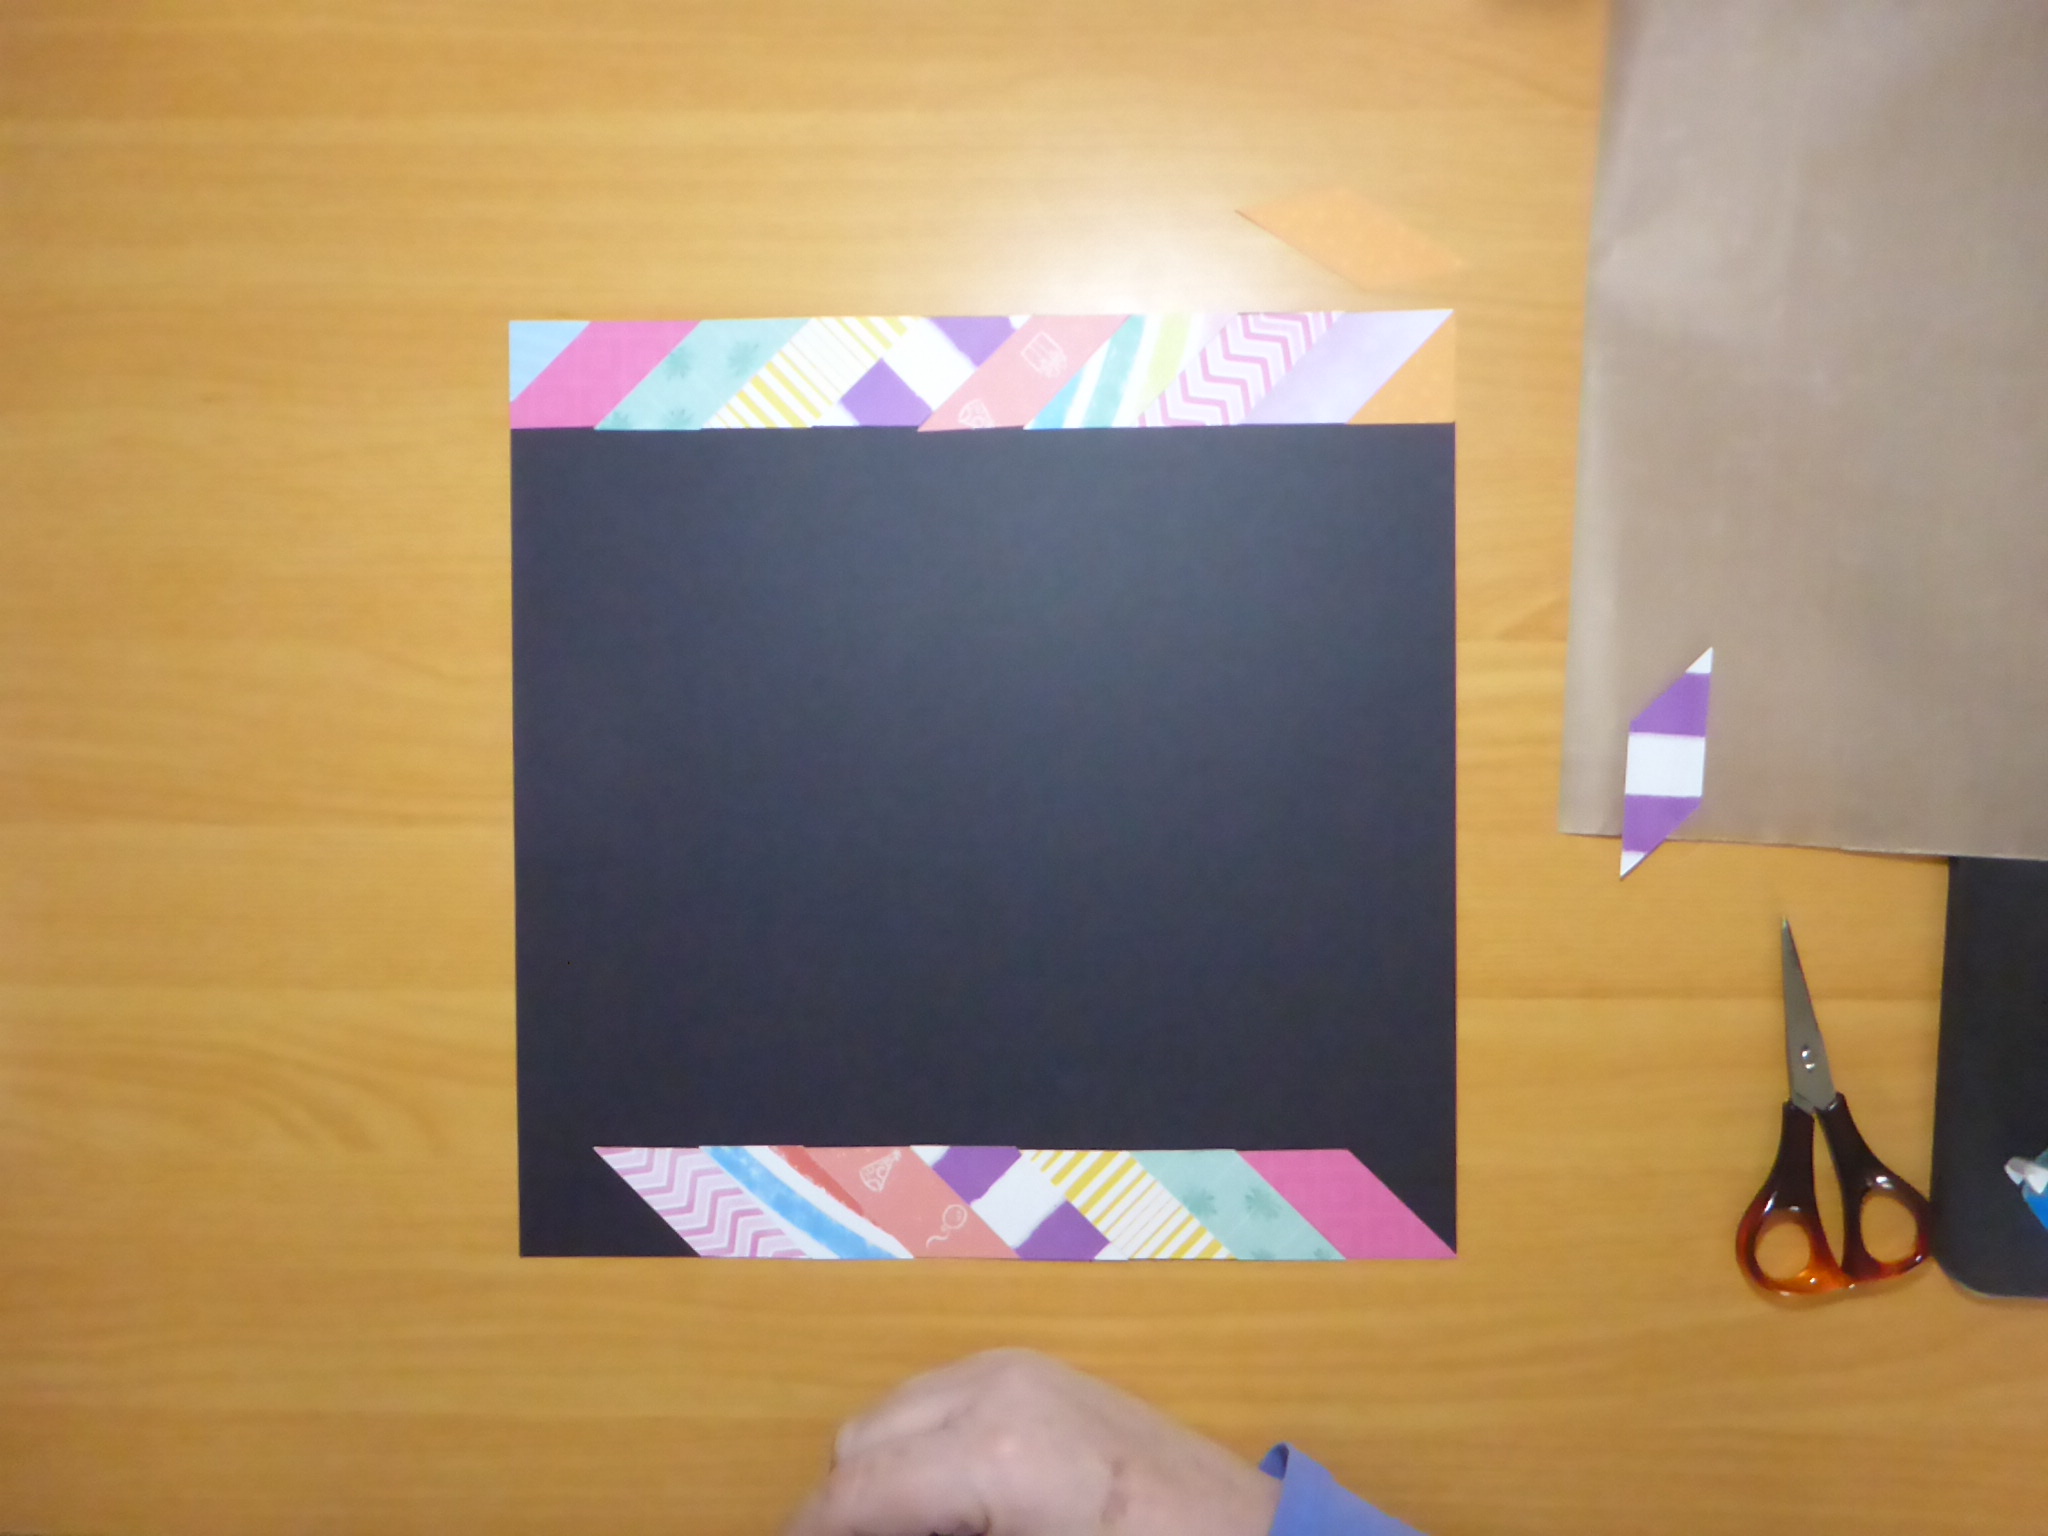
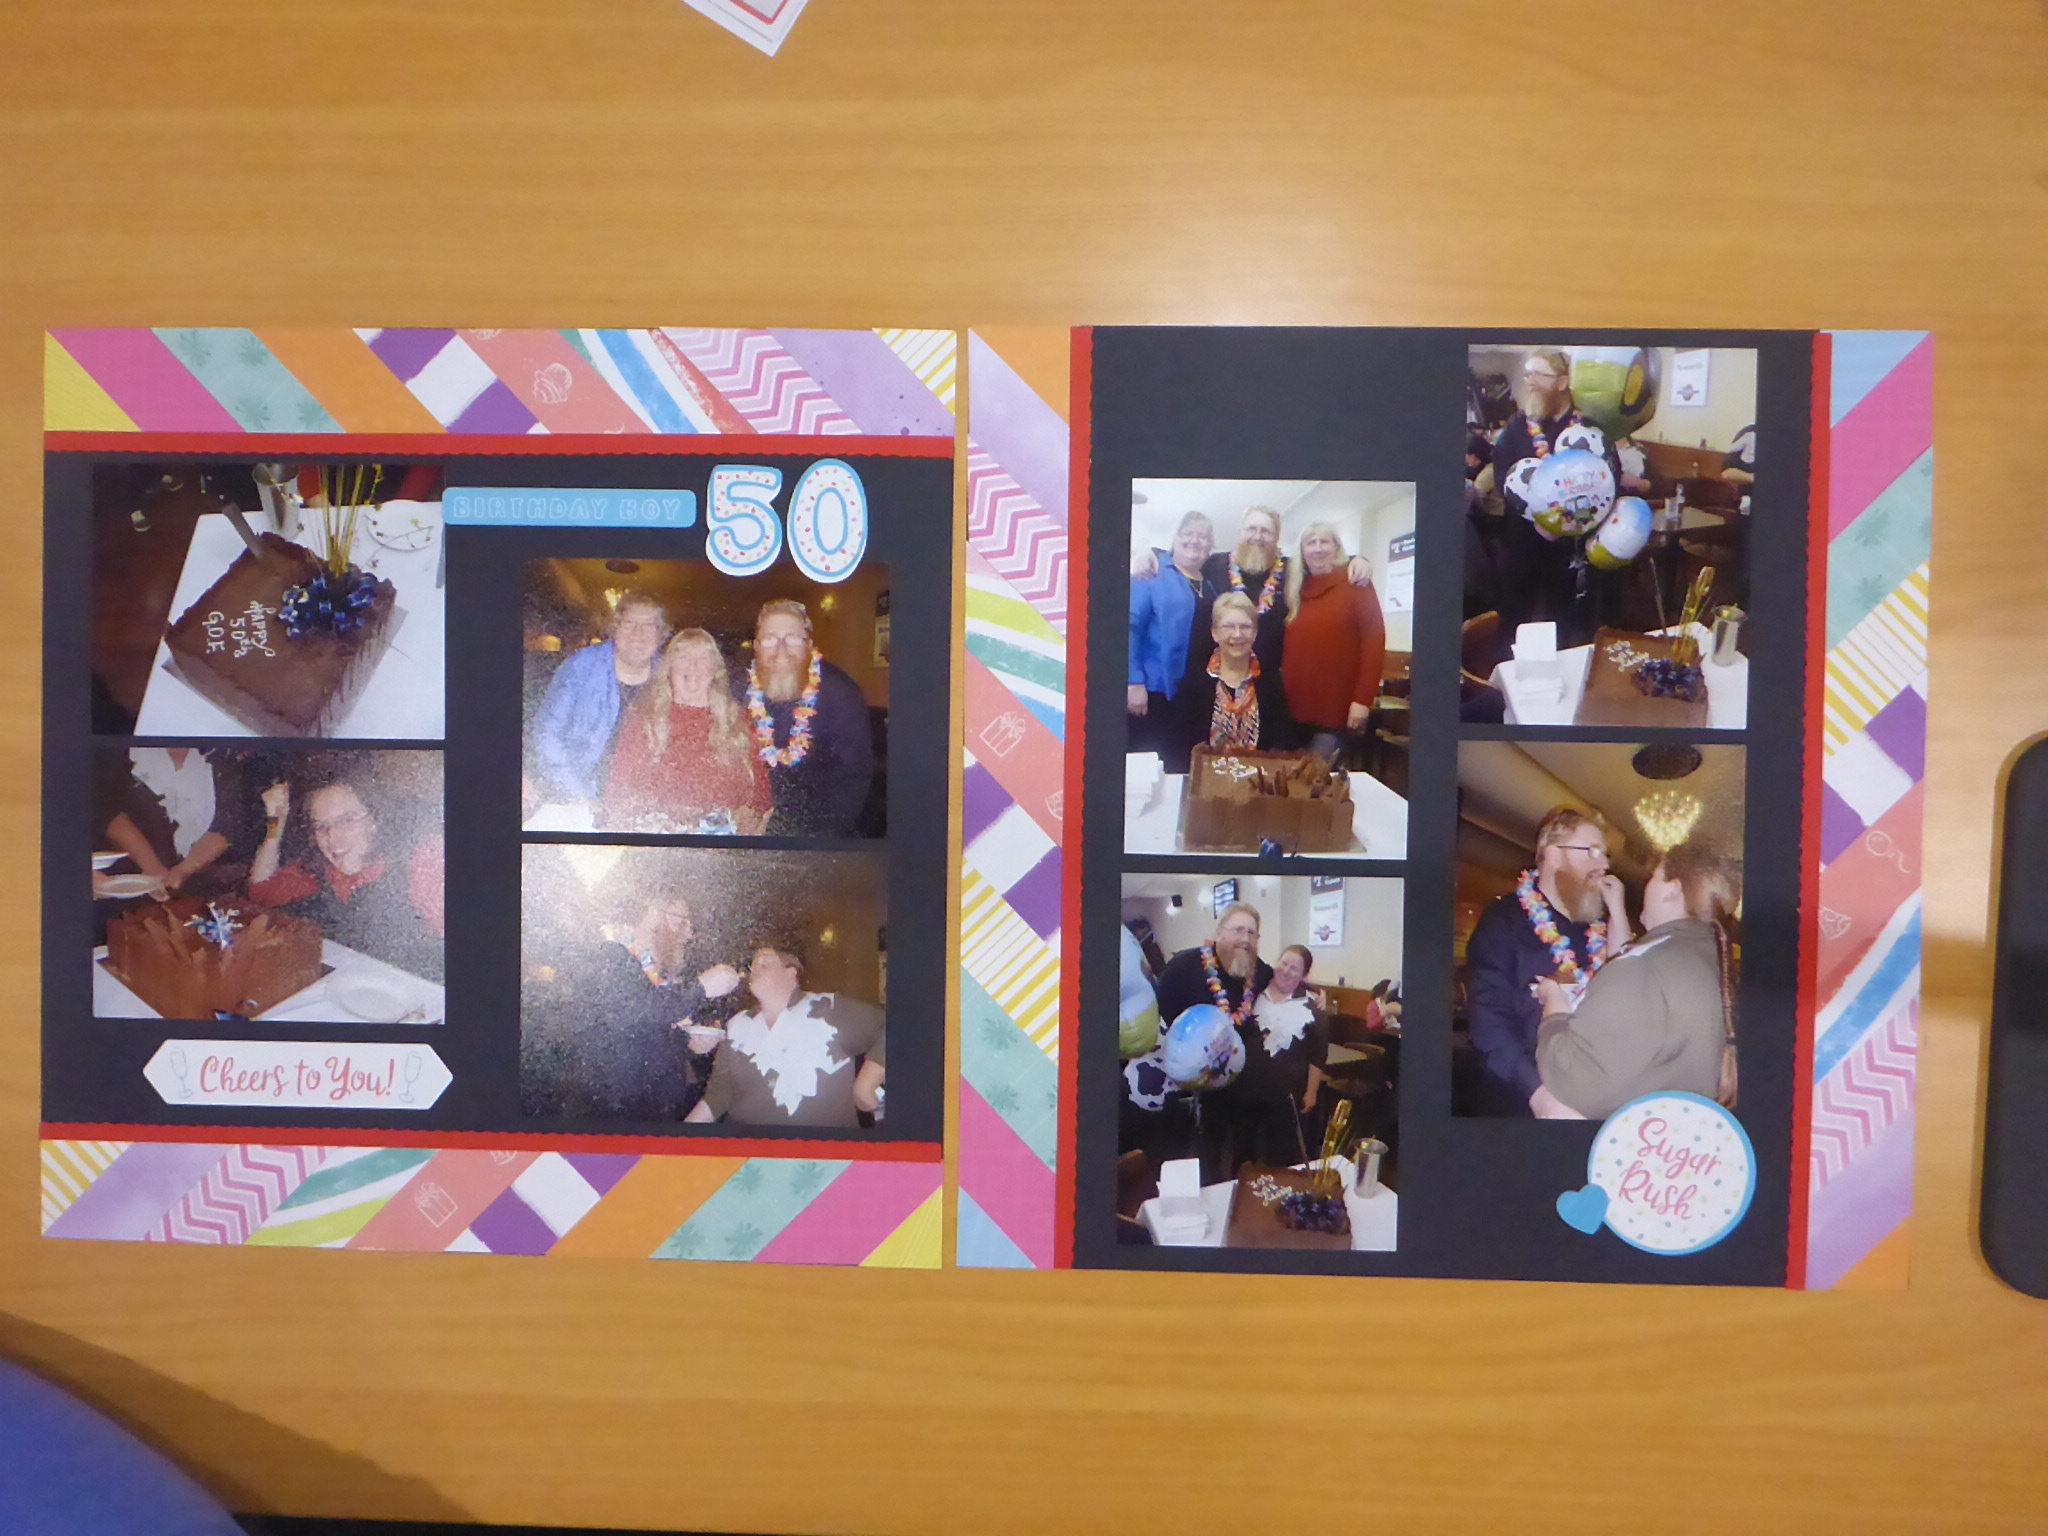
In my second layout, I had enough photos for a 2 page spread, but the photos didn’t all orient the same way. But not to be deterred, I decided to turn one page on its side, and I am quite happy with the result. I haven’t matted these photos as I think they stand out quite well on the black background without any matting. I also changed the ¼” strips slightly by using one of the decorative blades from the 12-inch trimmer when cutting the inside edge of each strip.
I have used stickers from the now discontinued Happy Birth-YAY collection, using the ‘50’ as my title, and other stickers as embellishments. I am yet to complete my journaling, but that is definitely on the to-do list.
You can download and print these instructions here.